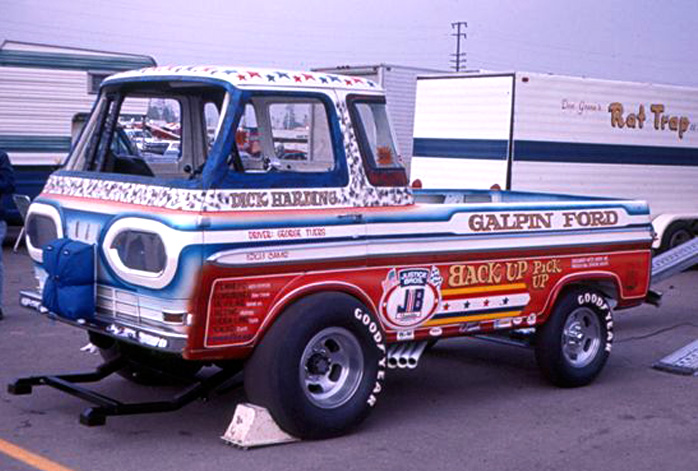
1. After primer and white base coat - Paint entire body gloss white - pearl white.
2. Tape off side chrome moldings and rear windows with Bare Metal Foil.
Airbrush all red areas with Testors "Dark Red" (See photo 1)
3. Tape off side windows and wind shield area with Bare Metal Foil.
Airbrush all blue areas with Tamiya "Brilliant Blue" (See photo 1)
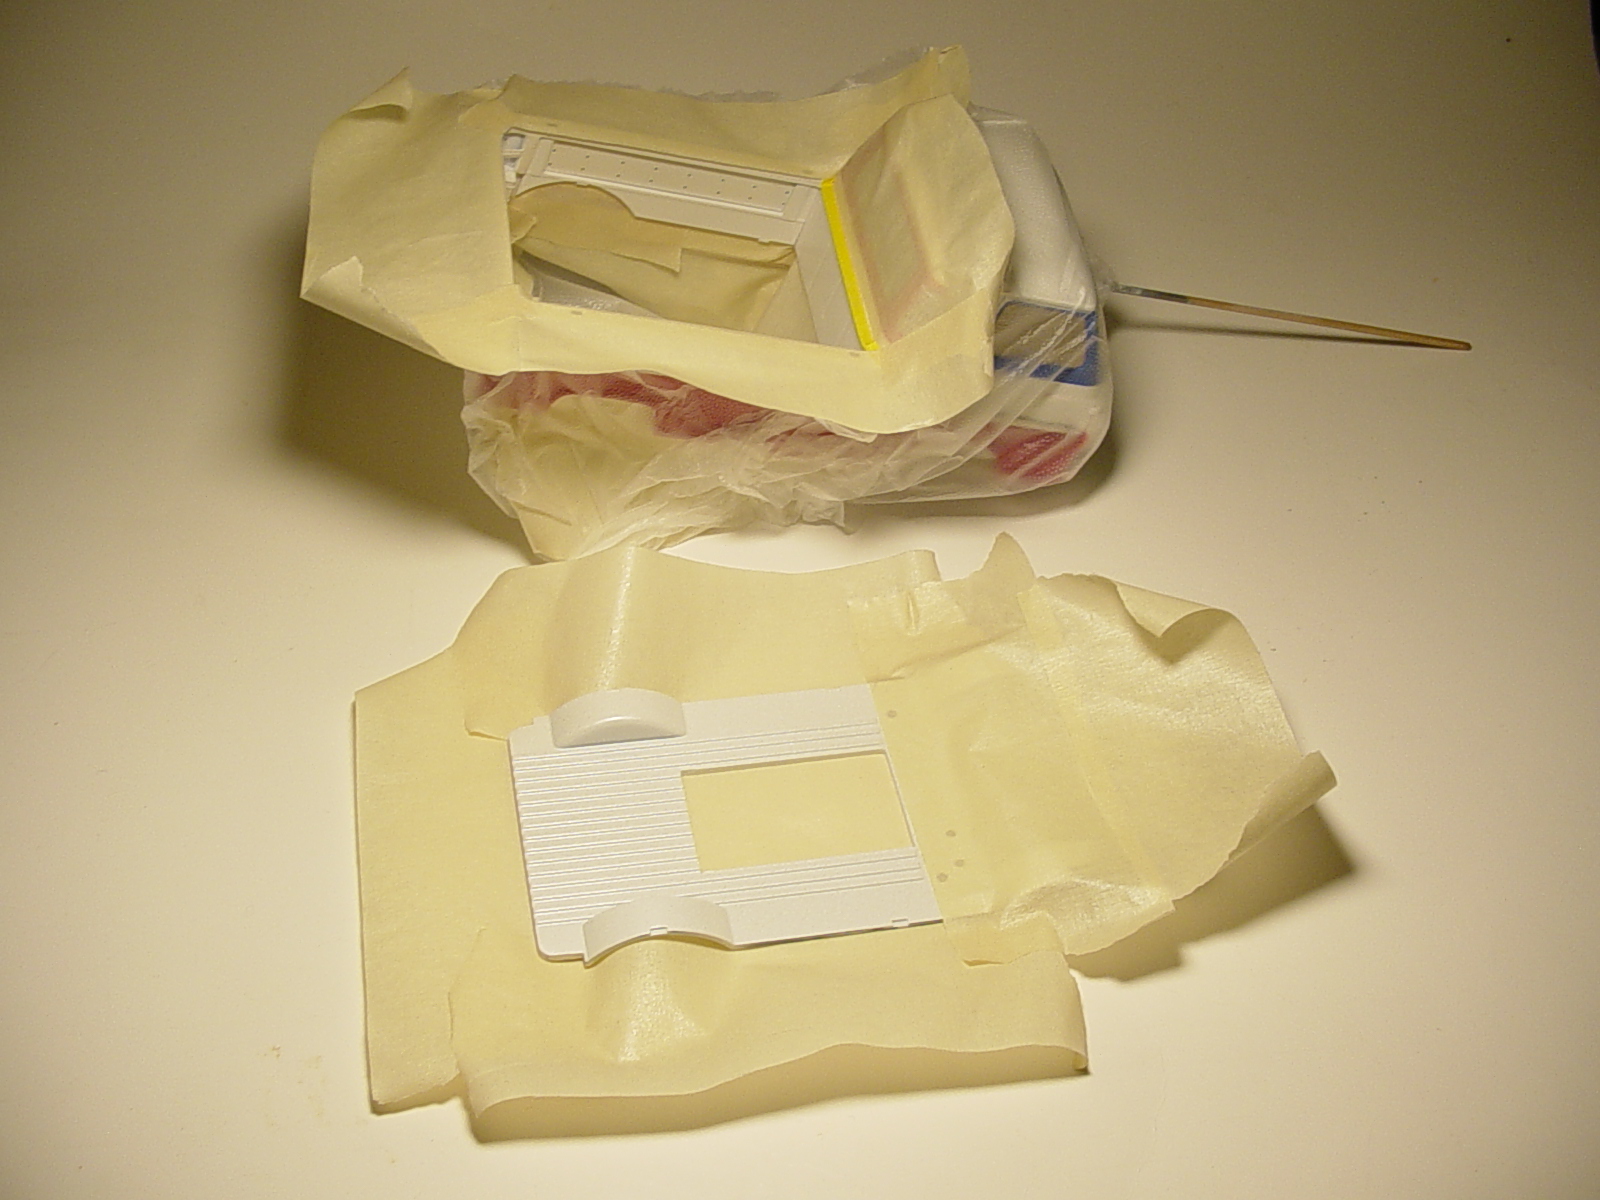
4. For Splatter Paint in bed area:
Use GLAD "Press & Seal" and masking tape to tape off body and rear of bed. (See photo 2).
Use Tamiya "Brilliant Blue" Turn down air pressure and use large tip on air brush (or)
Spray from the can at a distance to do a dusting of the parts. (See photo 3 for finished process).
![]()
![]()

Photo 1![]() Photo 2
Photo 2![]() Photo 3
Photo 3
Before starting..... Clear all decals with Tamiya Clear Lacquer ~!
1. Start with blue head light fade > remove excess at door line.
2. Apply blue side fades (both sides) > remove excess at door line.
Note: All side blue fade decals were made longer.... They will need to be cut in the door lines or panel lines.
Blue fades can be touched up with Tamiya Clear Blue.
3. Apply tail gate blue fade decal
4. Add separate blue fades above head lights to meet up with side fades. > remove excess at panel line.
(these were made separate because of the curve and angle).
5. Add tail gate blue smoke center decal
6. Add the White Base Coat F-O-R-D letters and follow with Red & Yellow F-O-R-D letters.
7. Add GALPIN FORD with stars to roof.
8. Add white base side panels and follow with orange and yellow side color panels.
(Work fast with the color panel decals or the color may run).
9. You will notice that there are two sets of "GAPIN FORD" and "DICK HARDING" decals.
Place the "METALIC GOLD" decals on first as a base and then add the color decals over the top.
This will create a "MACHINE TURN" effect.
10. Extra white decals were added so they can be "Doubled Up" for better coverage.